Hadoop Distributed File System (HDFS) cluster Configuration by using Ansible-Playbook
Nowadays, Data is the new fuel to boost up the Economy in almost all companies. This is because of our capability to store that huge amount of data. Big data tools like Hadoop, Spark, etc make it easy for us to store that much of data.
Now, let's see about Hadoop. Hadoop is the Open source tool built on Linux OS and Java. Meanwhile Java is used for storing, analysing and processing large data sets.
Let's see How hadoop stored that huge amount of data?.. The answer is it simply used Distributed File System to create one huge cluster in which distribute all the data to more number of systems in that cluster. That Cluster is called HDFS cluster.
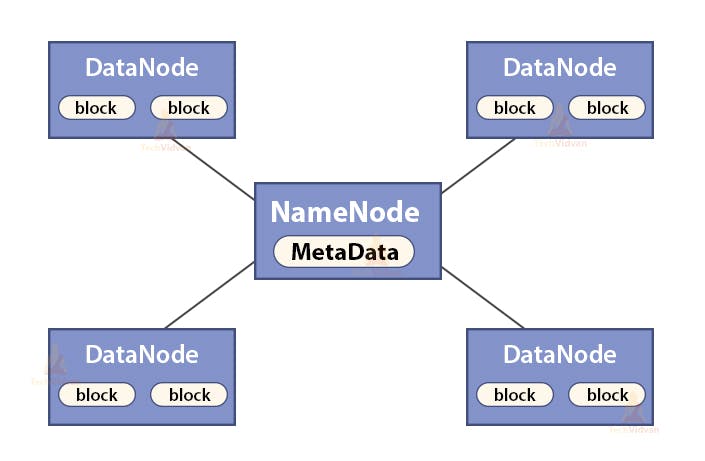
HDFS cluster(single node) contains single Name node and multiple Data nodes. Name node contains the meta data of datanodes that includes datanode name, address, permissions,etc whereas datanode is solely used for data storage purposes.

The configuration of HDFS cluster takes more time and effort by manual way. So, Nowadays it is automatically configured by using Configuration tools like Ansible, Chef, etc. But Ansible is more preferred, why? You want to know? then refer my previous blog by clicking here
In this article, We are going to automate the configuration of the Hadoop cluster by using Ansible-playbook. I already explained about how to setup the inventory files to have a reliable connection between Controller node and managed node. We are going to apply the same for this task also. Here, we are going to use two EC2-instances, one for Name node and other for Data node.
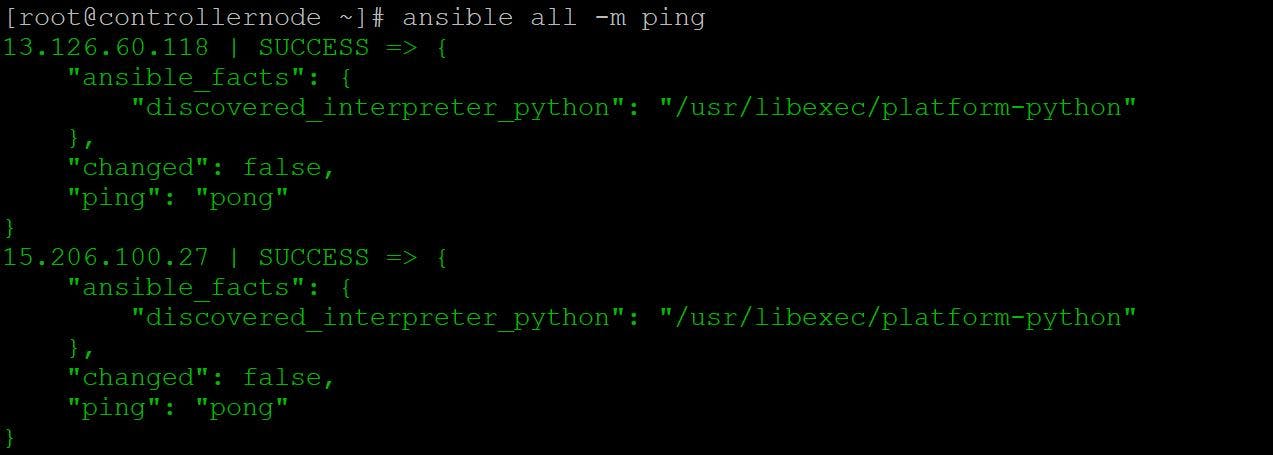
First we have to check the connection of managed node by using the following command
ansible all -m ping

Steps involved
- Installation of Java JDK
- Installation of Hadoop
- Name node Configuration
- Data node Configuration
- Start Cluster
Code Explanation
Java JDK Installation
Since Hadoop is Java based, it requires Java to installed in your systems. You can find how to install Java JDK in below figure.

I have Java JDK rpm file in my controller node and I am exporting this to my managed node's root directory by using copy module and for eliminating gpg-key-check I disabling it so that I need not enter the key.
Hadoop Installation
Next step is to install the Hadoop by the following scripts.

Note: Java JDK and Hadoop installation should be done on both Namenode and Datanode.
Namenode Configuration
Steps involved
- Creation of Namenode directory
- HDFS-Site.xml file configuration
- Core-Site.xml file configuration
- Turning off SELinux
- Format
- Start Namenode
Namenode directory creation
The directory should be created in Namenode so that we can store the metadata of datanode and provide it to the client.

The directory must be created inside "/" this location only or else there will be a problem when starting the nodes. In Ansible, file module is used to create one new directory.
HDFS-Site.xml file configuration
This is one of the configuration file in hadoop, you can see this in /etc/hadoop/core-site.xml this location and you have to specify the storage details and also storage location details where metadata of data nodes are stored.

Actually I created one file in Controller node named as hdfs-site.txt which has all the configuration scripts and I am copying to Managed node's configuration destination (you can refer it in above figure) by using template module since I used vars_prompt for getting the directory name from user.
Core-Site.xml file configuration
This is also one of the configuration file in hadoop, you can see this in /etc/hadoop/hdfs-site.xml this location and you have to specify the Namenode or Master IP.

Note: If you are using EC2 instance, then Master IP would be 0.0.0.0, if you are using Virtual Machine as an environment, then you can use either Namenode IP or 0.0.0.0.
Actually, I created one file in Controller node named as core-site.txt which has all the configuration scripts and I am copying to Managed node's configuration destination (you can refer it in above figure) by using template module since I used vars_prompt for getting the MasterIP from user.
Turning off SELinux
You have to turn off the SELinux and firewall in your both Namenode and Datanodes. It won't let connect datanode with Namenode due to some Security reasons.

Format
Next step is to format the Namenode in order to create one new filesystem for storing the metadata of datanodes.

Note: Format can be done only in namenode and shouldn't done on datanode and that too in Once. If you do format multiple times, it may corrupt your filesystems.
Start the Namenode
Now, All are set!. Now you have to start the Namenode


Now, Namenode is started. Next step is to Configured the datanode and connect it to the Namenode.
Datanode Configuration
- Creation of Datanode directory
- HDFS-Site.xml file configuration
- Core-Site.xml file configuration
- Turning off SELinux
- Start Datanode
Note: The installation of Java JDK and Hadoop for Datanode are same as we seen in Namenode.
Creation of Datanode directory
First step is to create one directory for act as a Data storage for clients. The size of that directory is the total size of that node. So, you have to create it to "/'' this directory.

Here, file module is used to create one new directory.
HDFS-Site.xml file configuration & Core-Site.xml file configuration

We already seen this purpose of configuration file. There will be small changes in Configuration file while configuring datanode. You can find it on the HDFS-site_data.xml file in my GitHub that I will mention in the end.
Note: You must enter your namenode or Master IP in your Vars_prompt. Note: The SELinux and firewall should be turned off in datanode.
Start Datanode
All set!. Now you have to start the datanode.

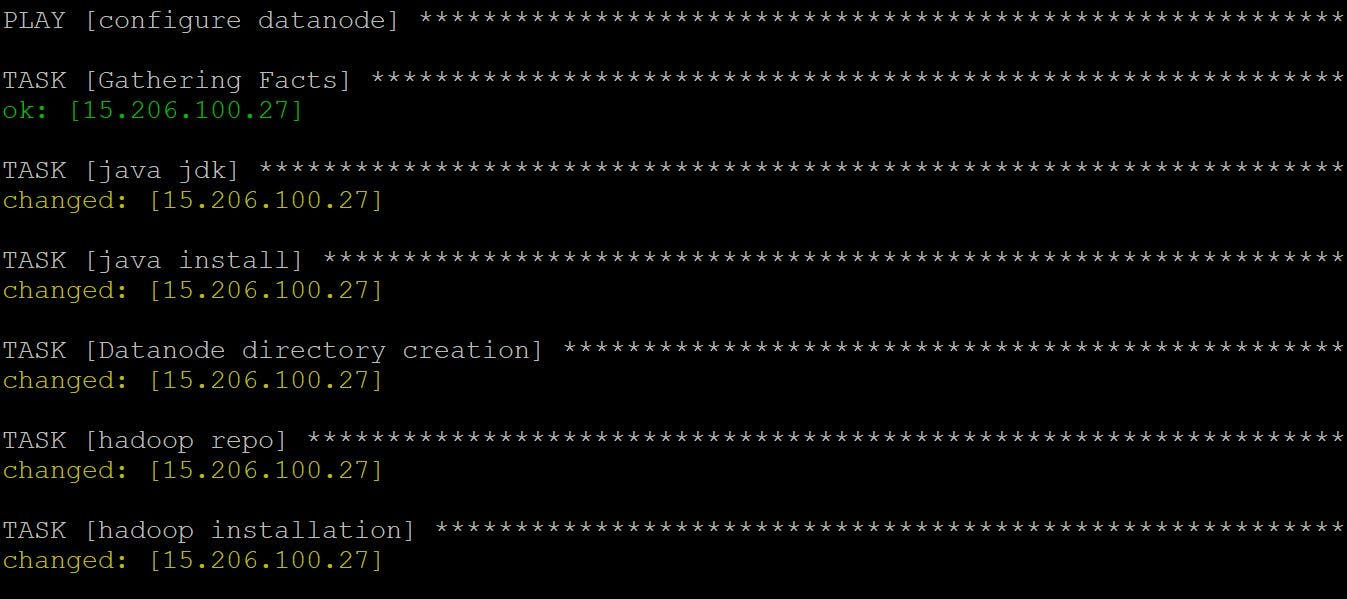
Code Output


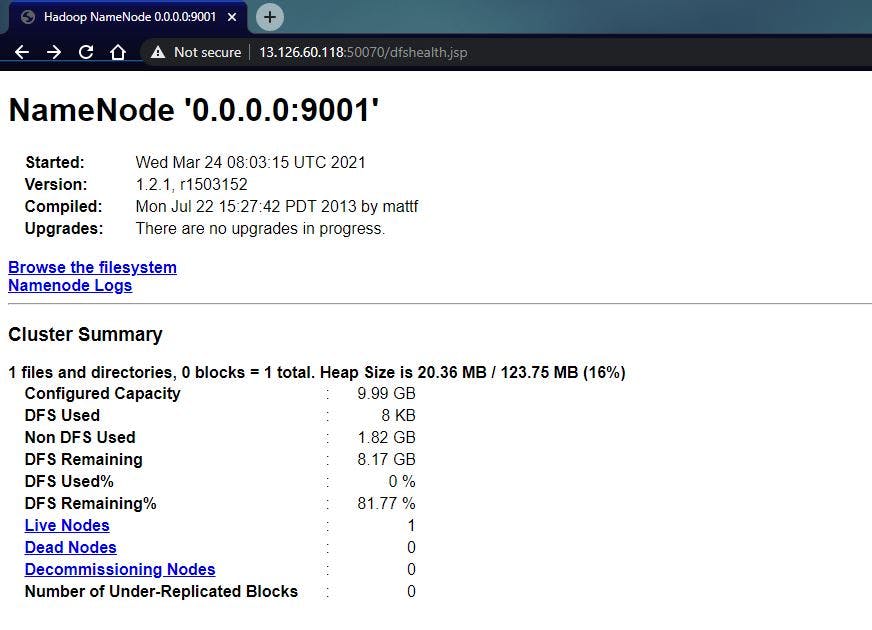
Final Output

It is the Namenode console, we can get this by enter the following lines in your browser.
http://namenodeip:50070
We done it! Yes, We successfully configured the HDFS cluster by using Ansible-Playbook. You only provided What to do, Ansible take the How to do responsibility. Thats it.
GitHub link: github.com/vishnuswmech/Hadoop-Distributed-..
If you have any queries, you can reach me through
Mail: vishnuanand97udt@gmail.com
Linkedin: linkedin.com/in/sri-vishnuvardhan
Thank for all for your reads. Hope it may clear some concepts and give some clarifications regrading Hadoop and Ansible. Stay tuned for my next article!!
